
In this post, I’ll show you three ways to declare tags in Studio 5000 Logix Designer.
If you don’t have access to Studio 5000, you can use this link to practice what you learn in this post by following a free, guided simulation.
If you’re not sure what a tag is, what I mean when I talk about a tag’s scope, or what the difference between a BOOL and a DINT is, then I recommend that you check out my previous post covering tag concepts before reading this one.
Now let’s get started.
The most common way to declare tags in Studio 5000 is by using the Tags Editor.
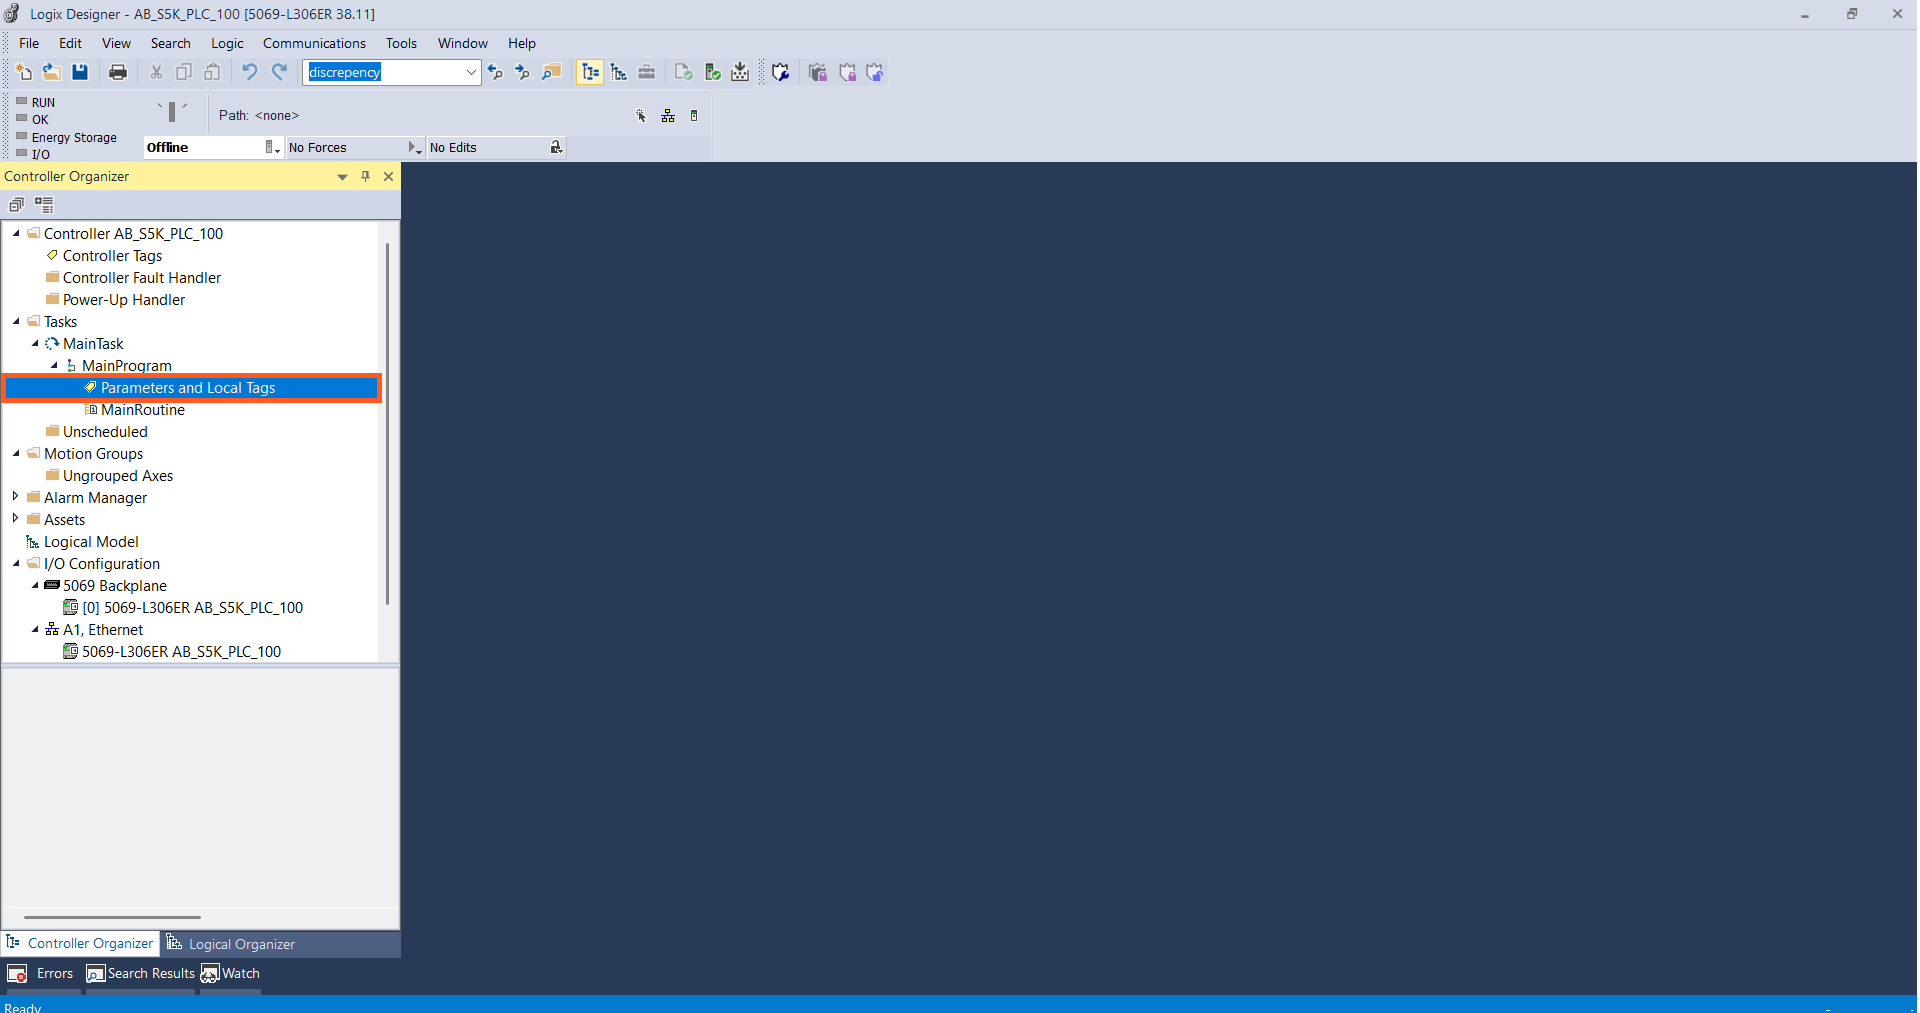
To open the Tags Editor, double-click on either the Controller Tags or one of the Parameters and Local Tags folders in the Controller Organizer tree.
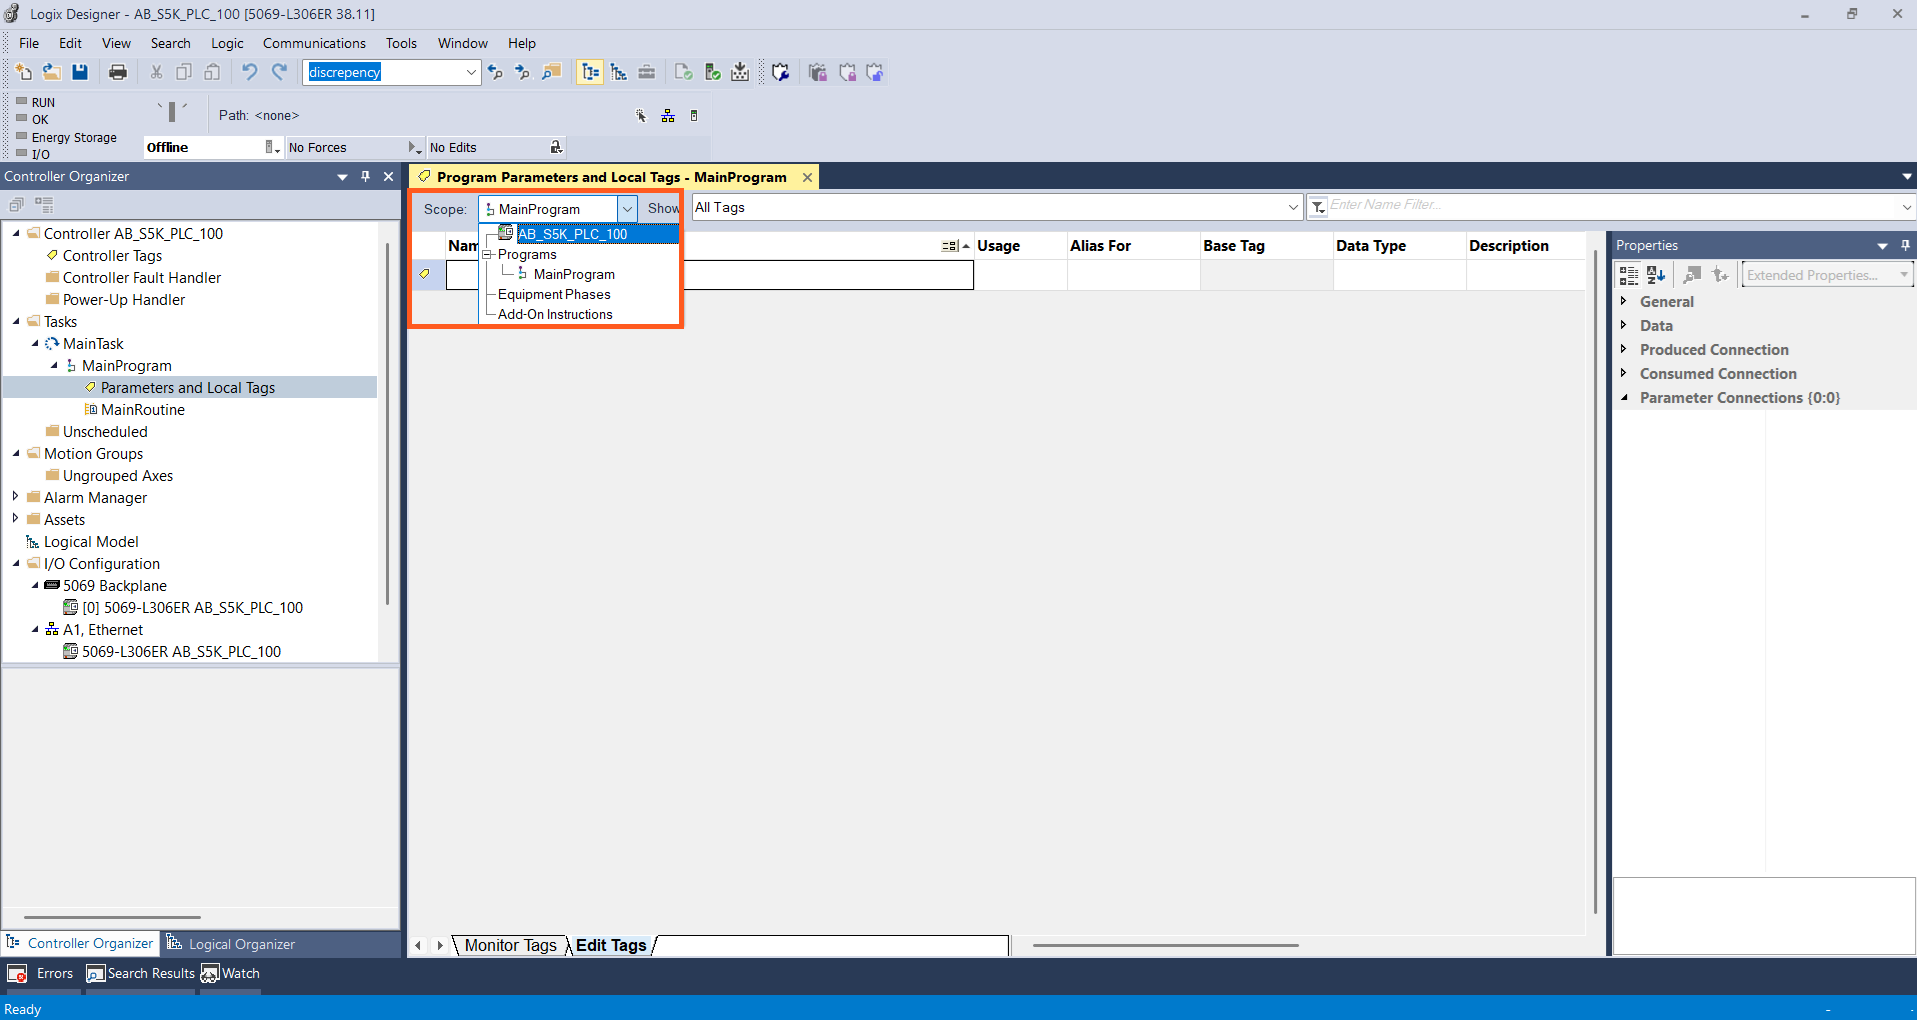
In the Tags Editor, you can switch the scope using the Scope drop-down in the top-left corner of the editor. If you open the Parameters and Local Tags Editor for a program, you can use this drop-down to switch to the Controller Tags Editor.
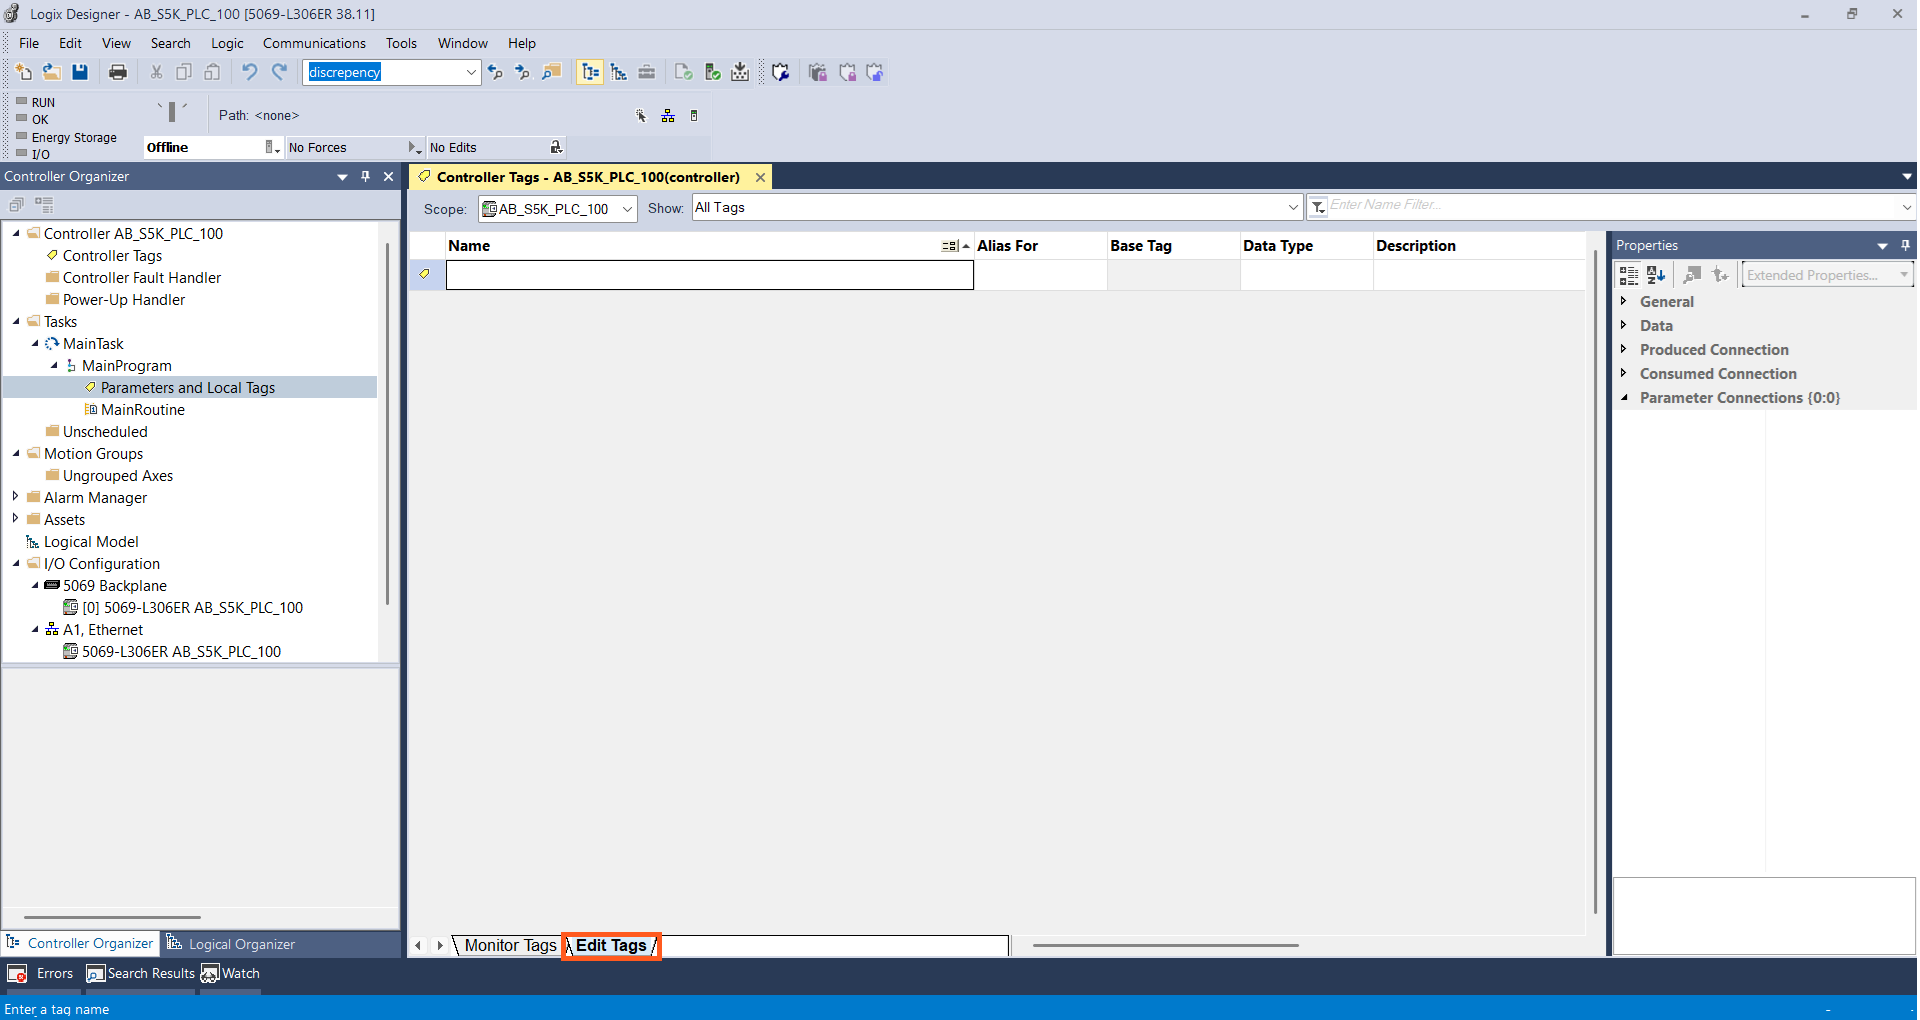
To declare new tags, you need to make sure that the Edit Tags tab of the Tags Editor is selected.
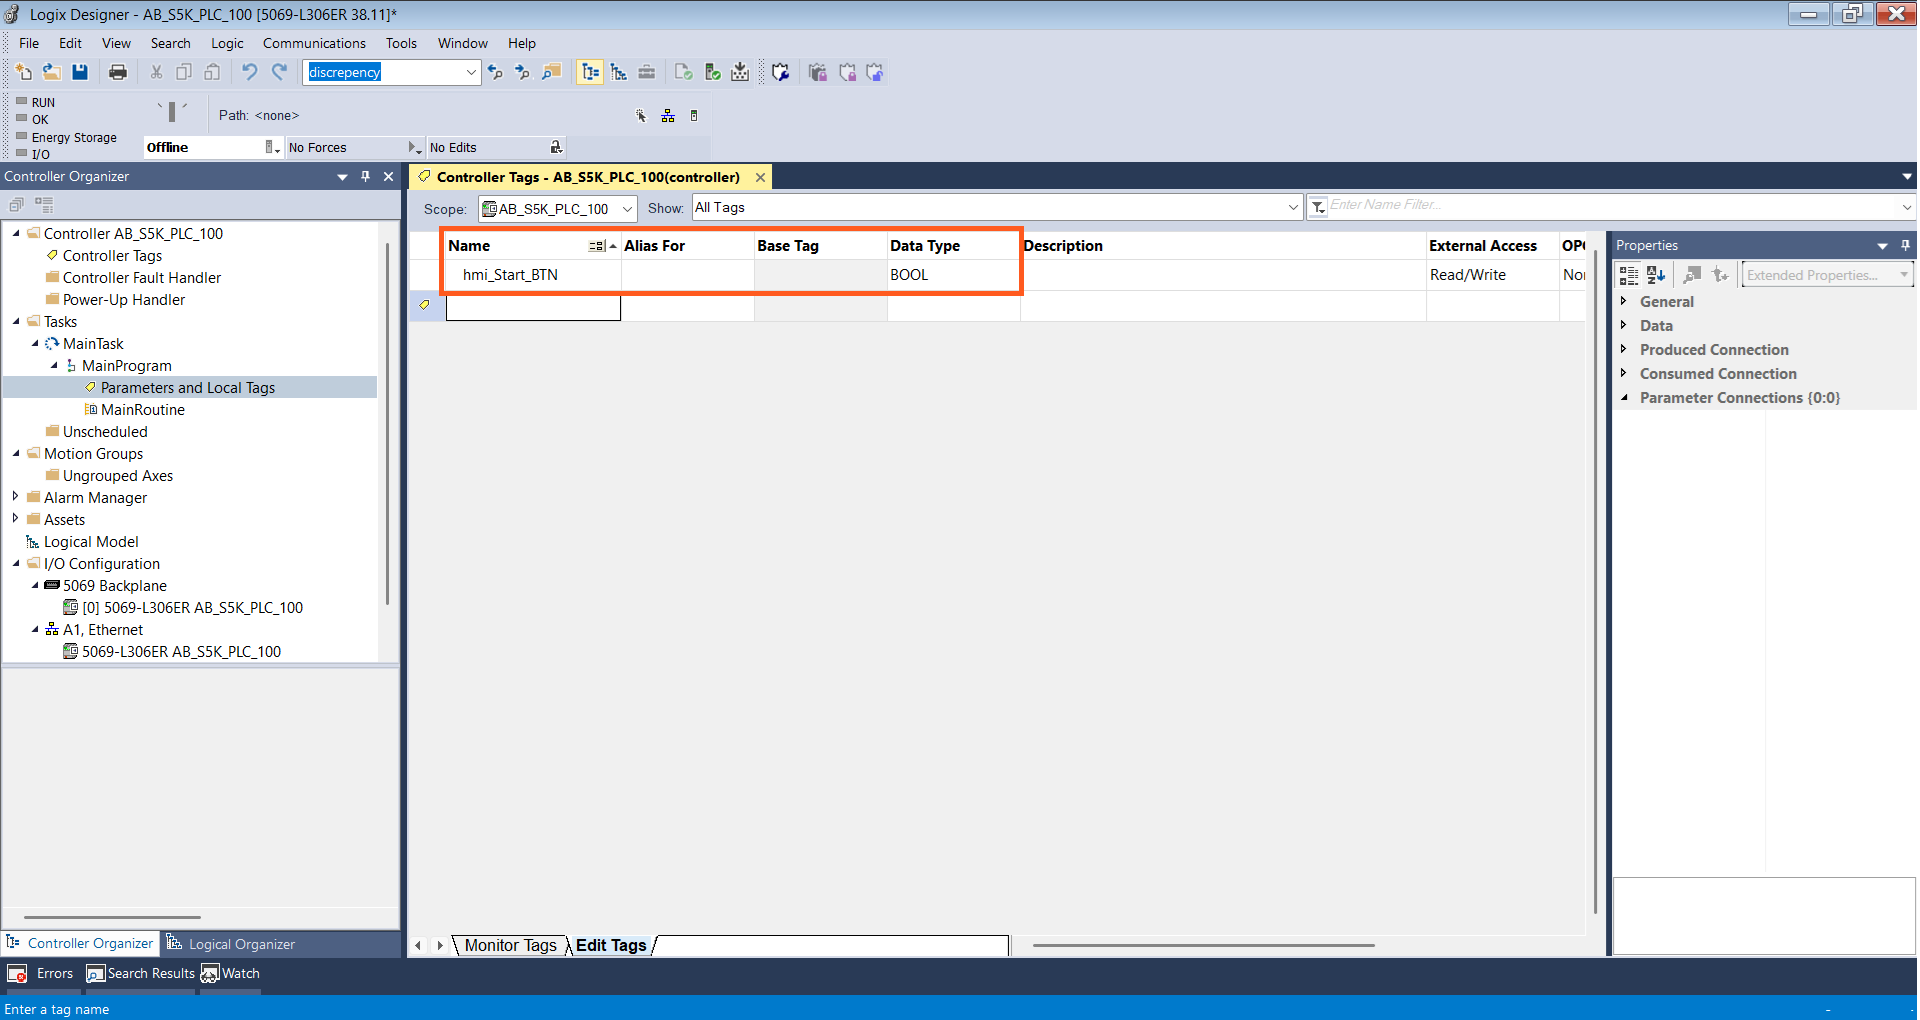
Then you can declare a new tag by entering the tag’s name in the Name cell. As well as giving the tag a name, you need to specify the Data Type for the tag. In this case, I’m creating a BOOL tag called hmi_Start_BTN.
I’m also a big believer in project documentation, so I will generally add a description to every tag in a project.
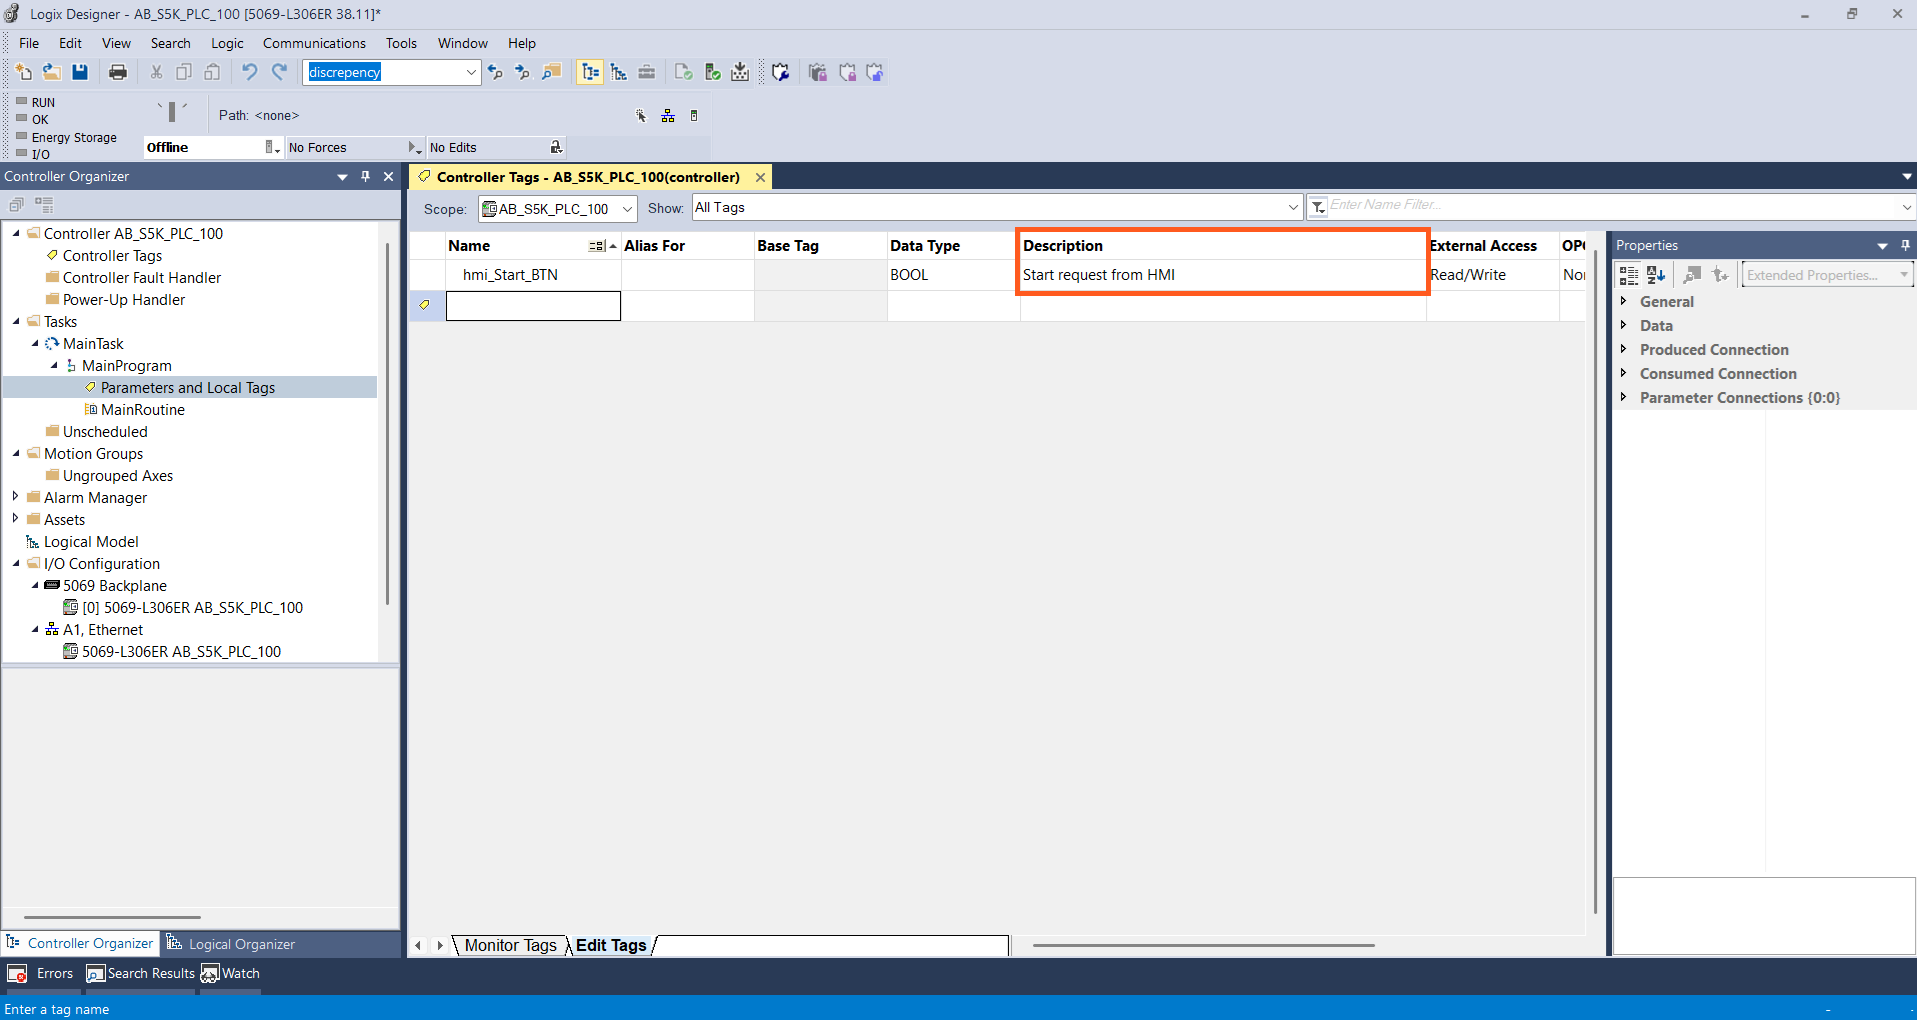
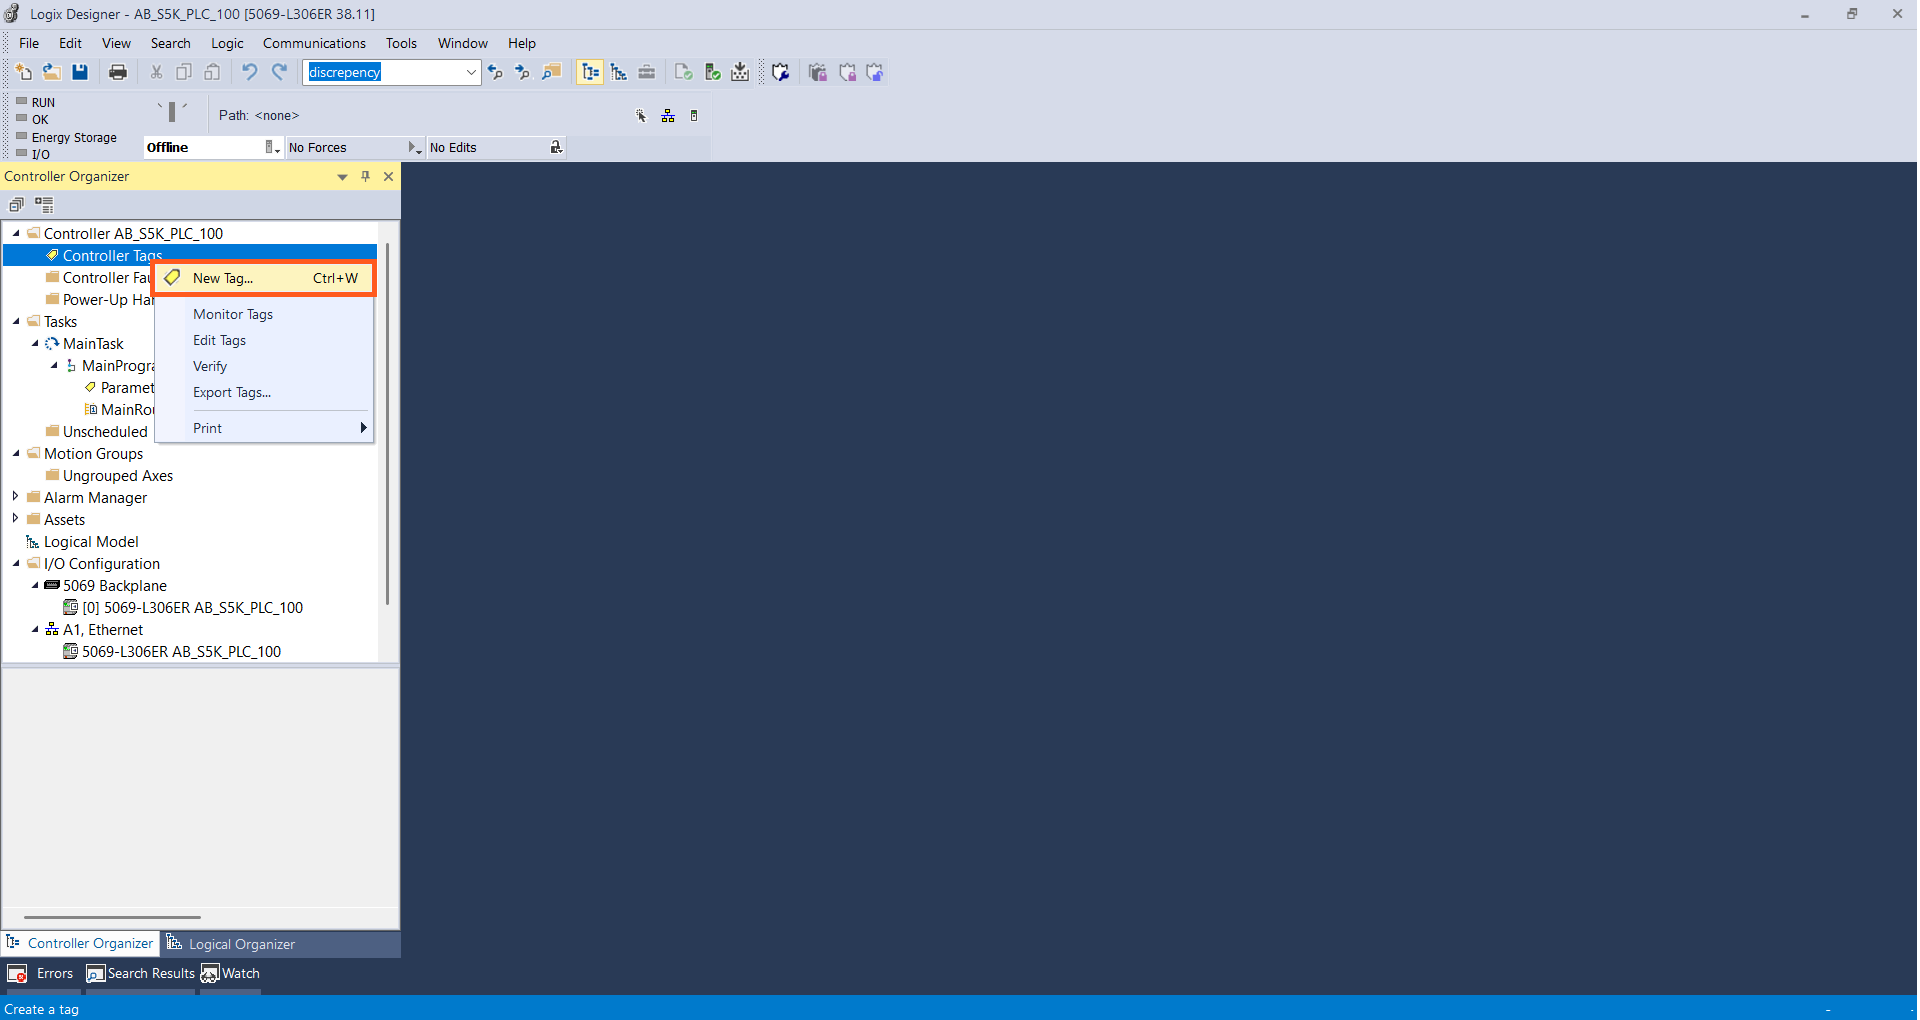
Another way to declare tags in Studio 5000 is to right-click on a tags folder in the Controller Organizer and select New Tag, or use the keyboard shortcut CTRL + W.
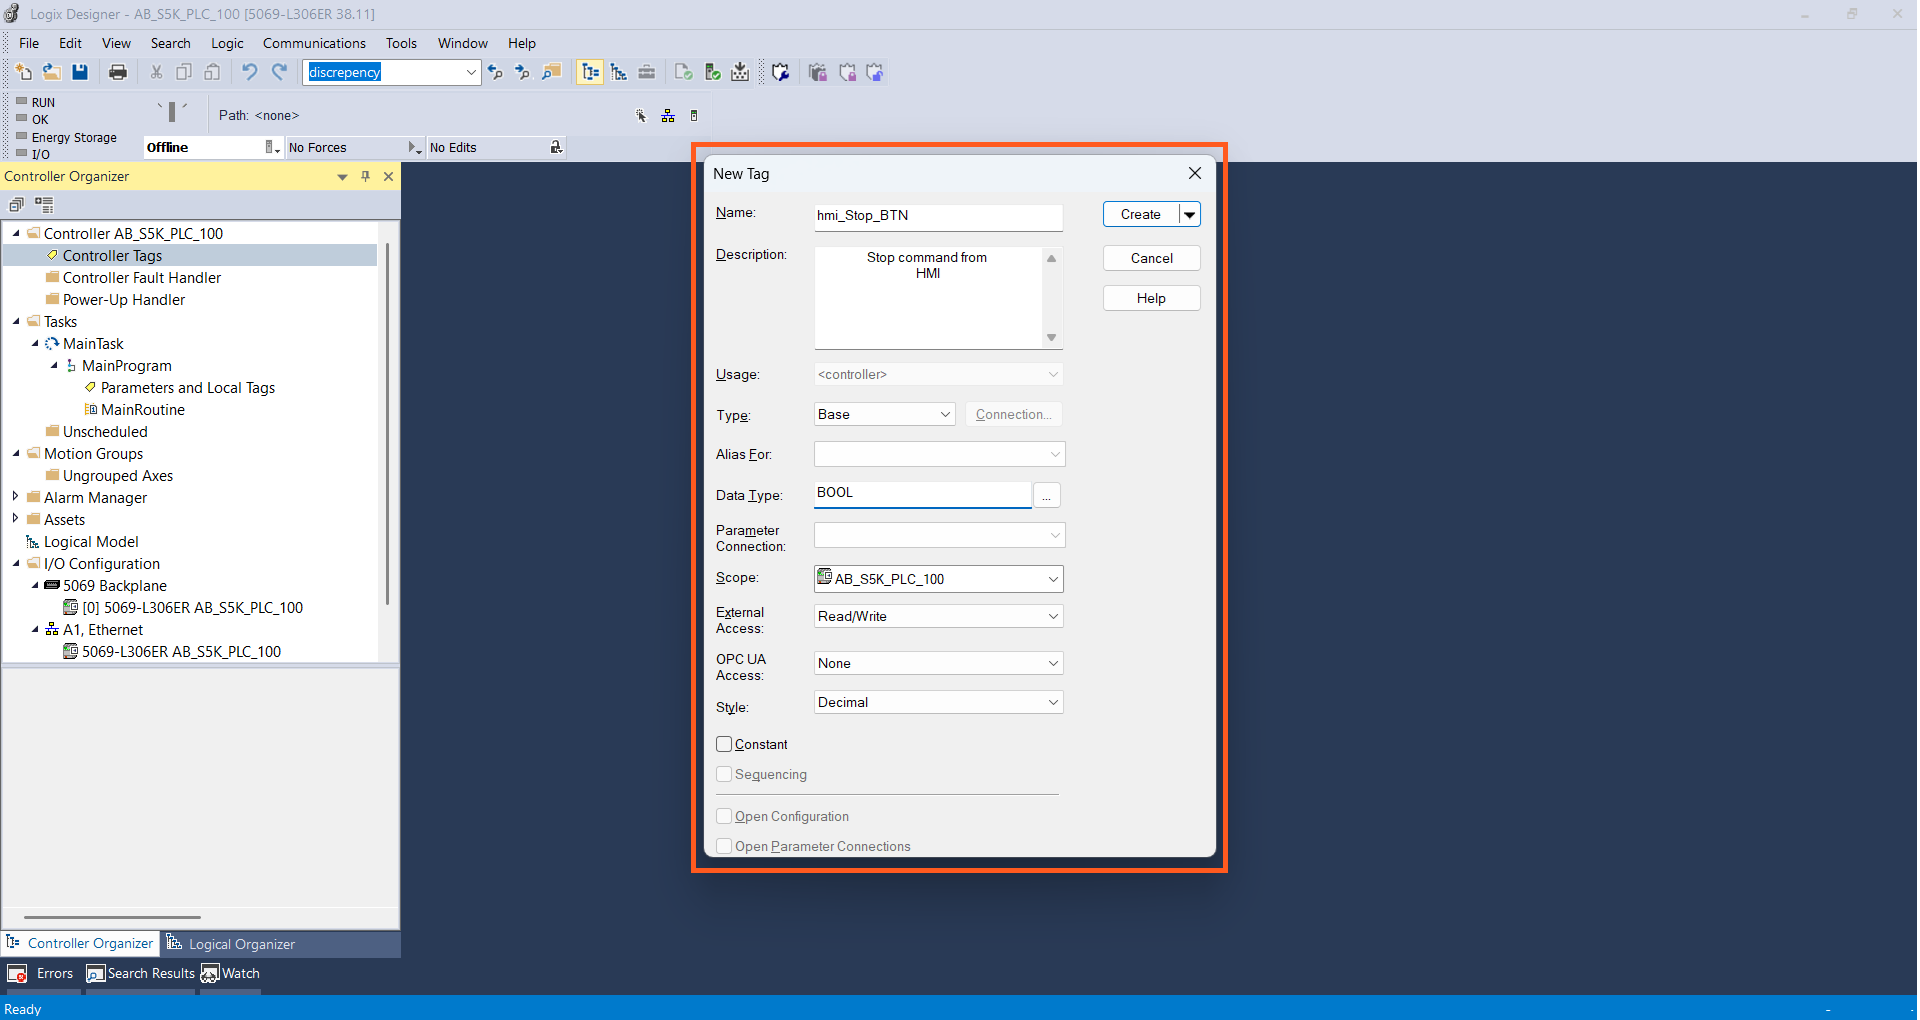
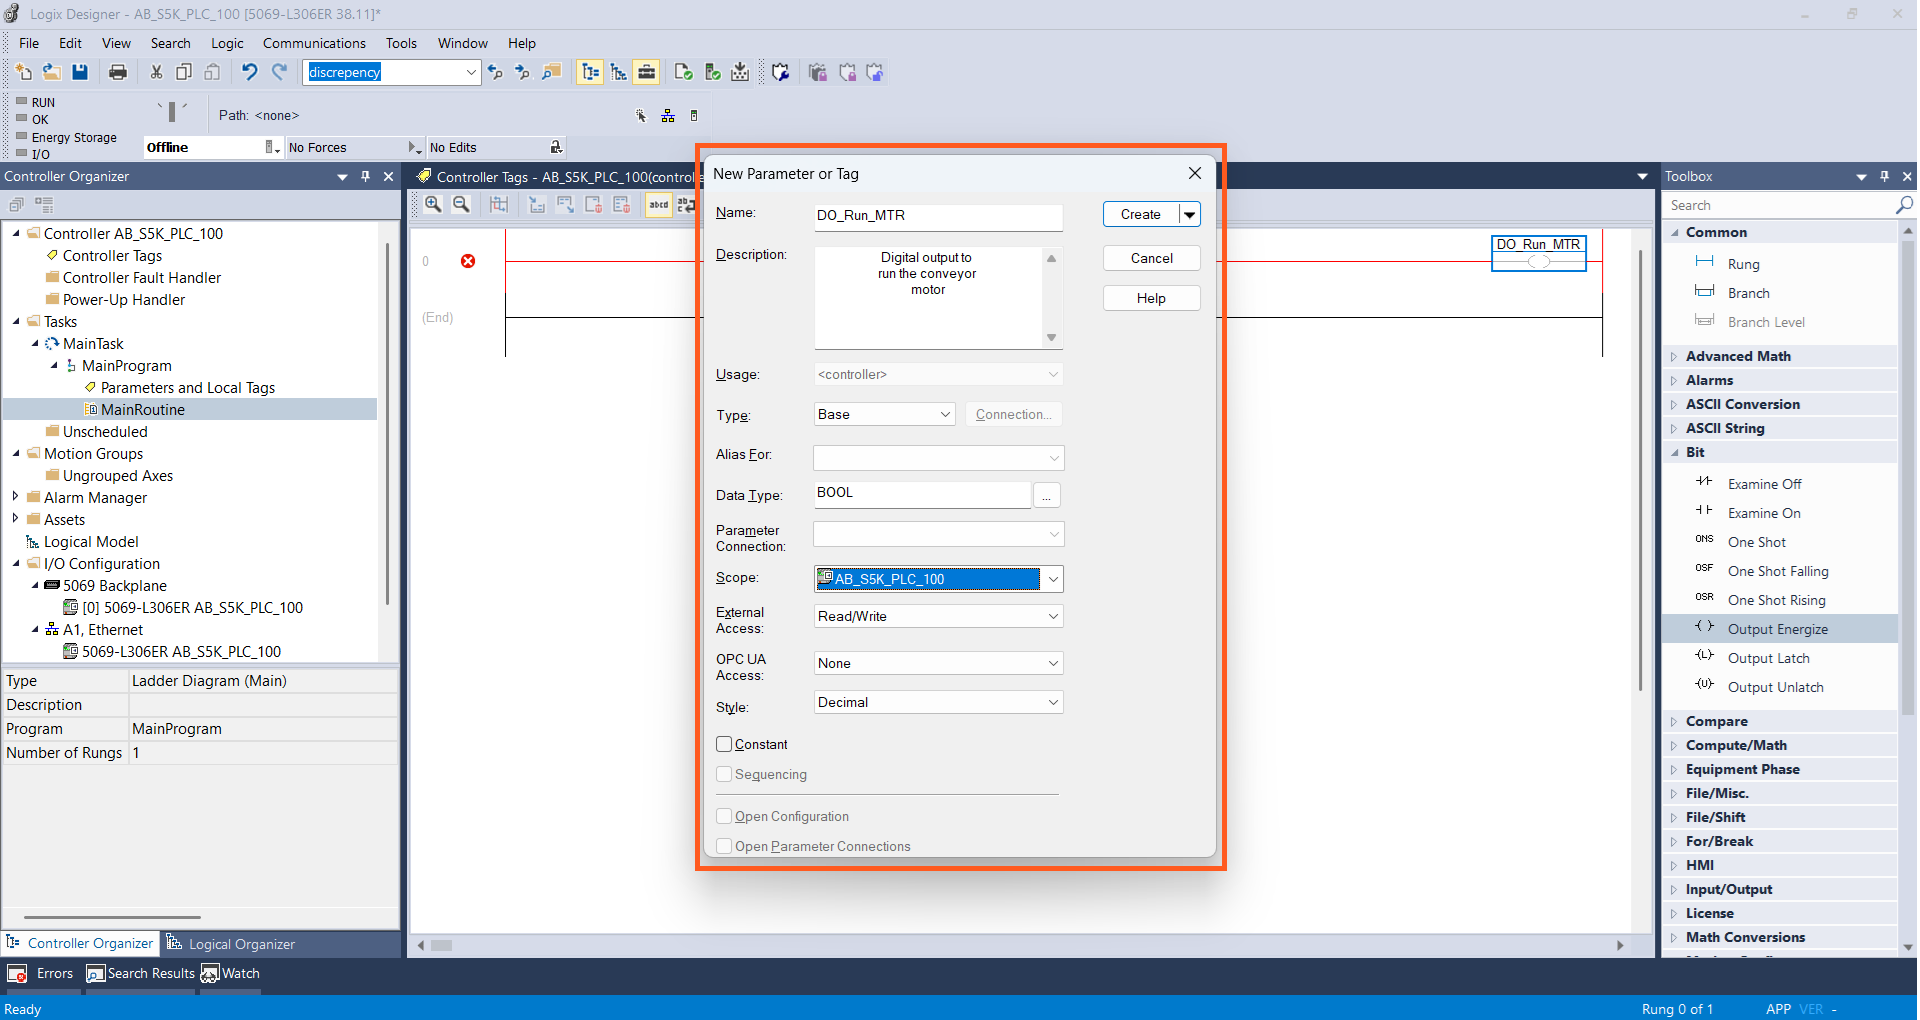
This opens the New Tag dialog box where you can fill in the details for your tag. In this case, I’m creating a BOOL controller tag called hmi_Stop_BTN with a description.
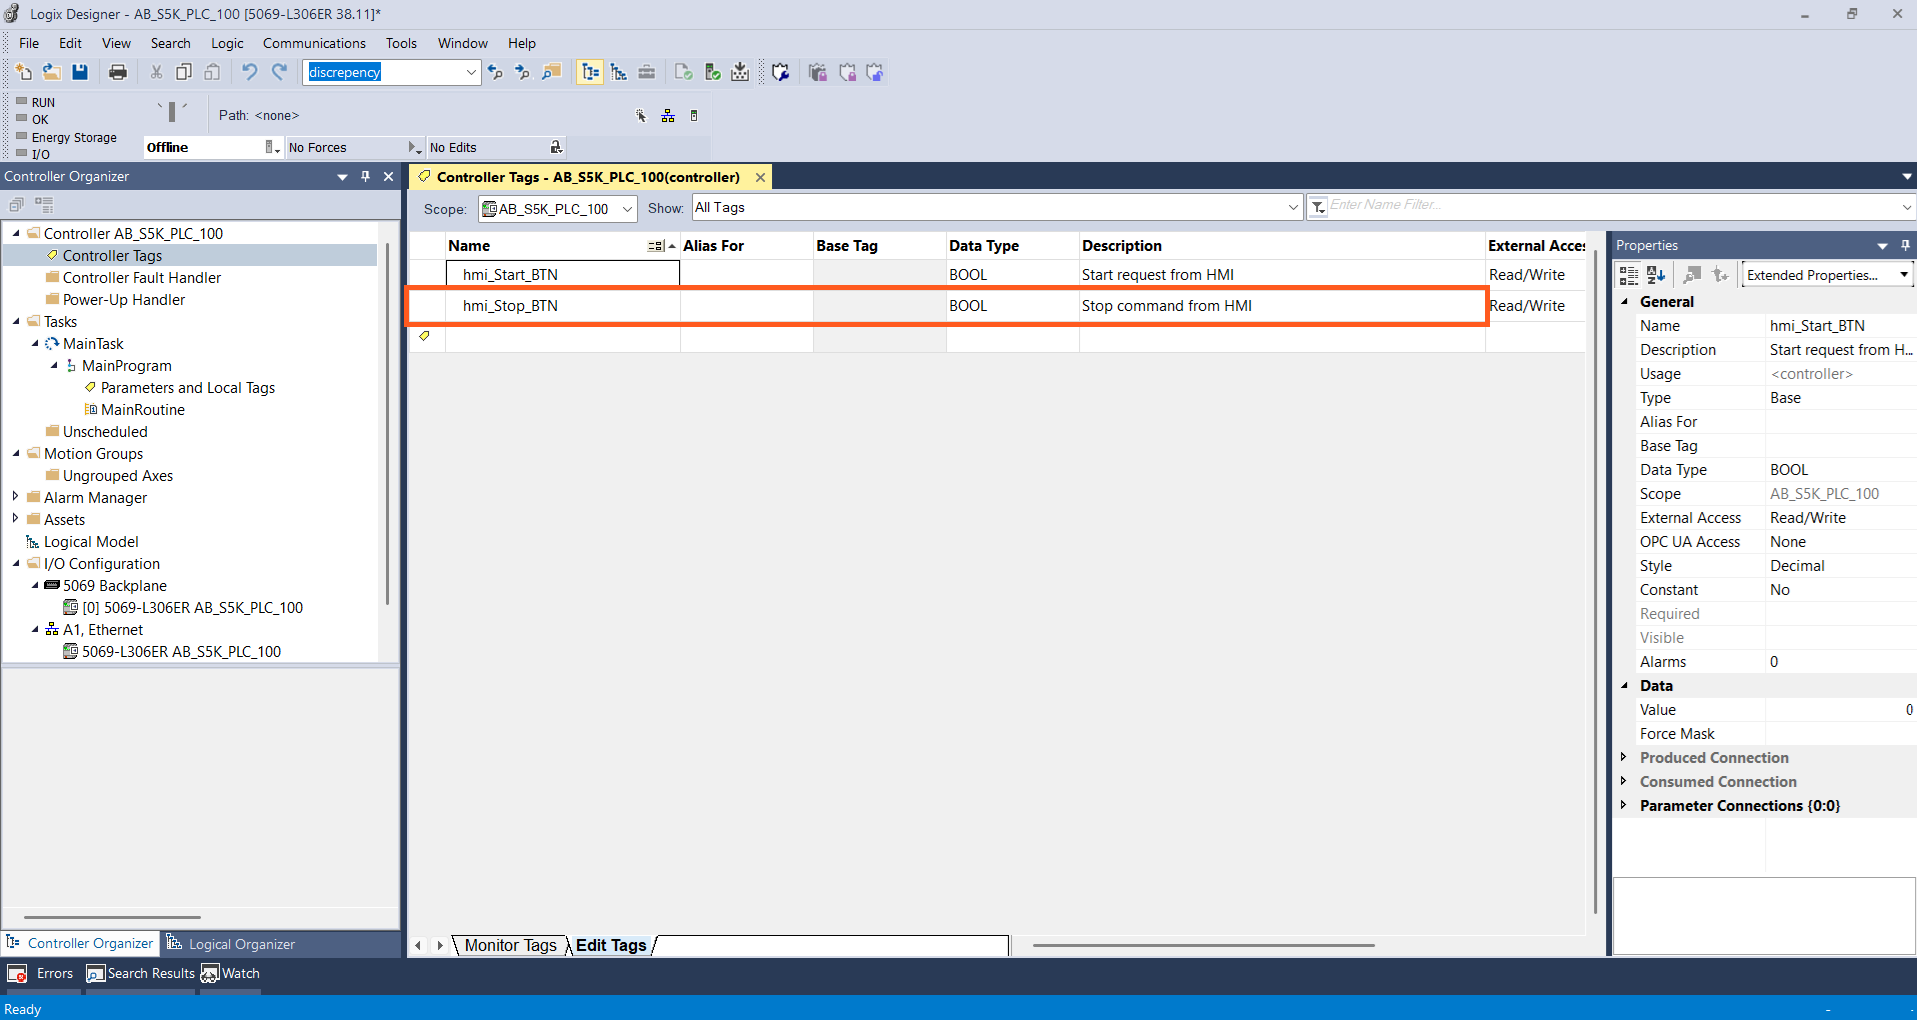
I click Create to create the tag and then I can see the tag listed in the Controller Tags Editor.
Finally, I can declare a tag by entering the name of a new tag in the Ladder Diagram editor and then right-clicking on the tag name and selecting New <Tag Name>.
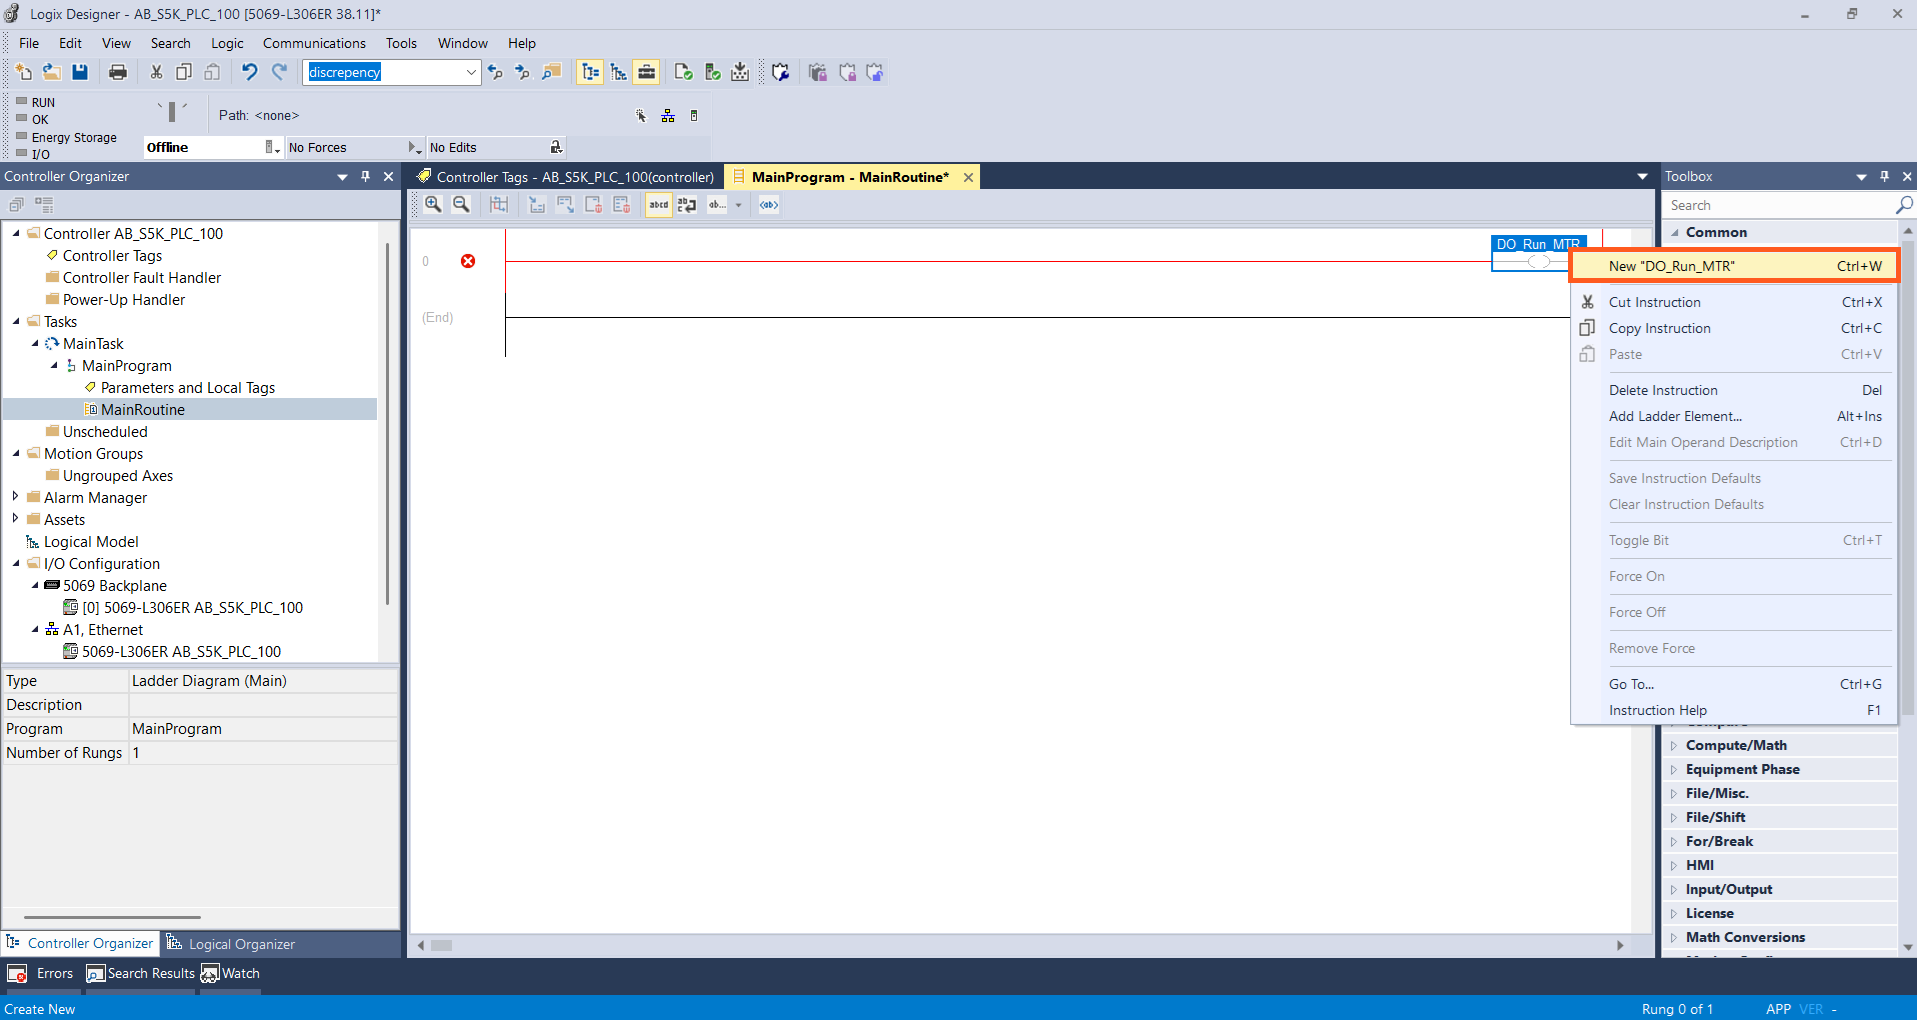
Once again, the New Tag dialog opens, and I can fill out the details for my tag before clicking Create to create the tag.
In this post, I’ve shown you three ways to declare tags in Studio 5000 Logix Designer.
Personally, I like method 3 the most because Studio 5000 automatically selects the correct data type based on the instruction that the tag is linked to. I only really use the Tag Editor if I want to see the naming convention that was used for other tags in the project.
If you want to practice what you’ve learned in this post but don’t have access to Studio 5000, use this link to get access to a free, guided simulation that goes through these same steps.
After declaring tags in your project, the next step is to write ladder logic. I’ll show you how to do that in the next post.
Get new content delivered straight to your inbox: